7 Easy Steps For Creating Forced Perspective Photography (With Images)
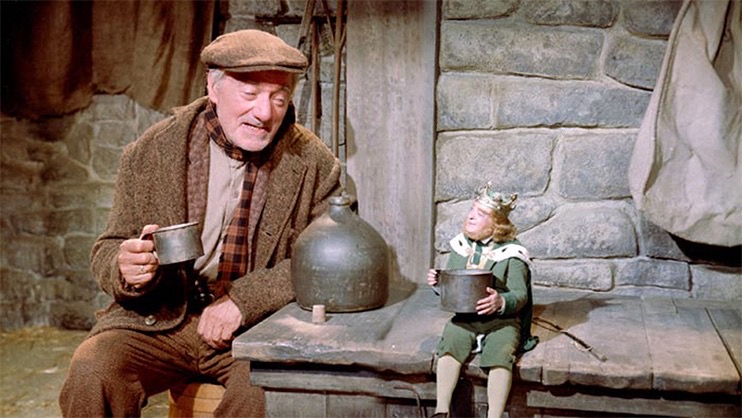
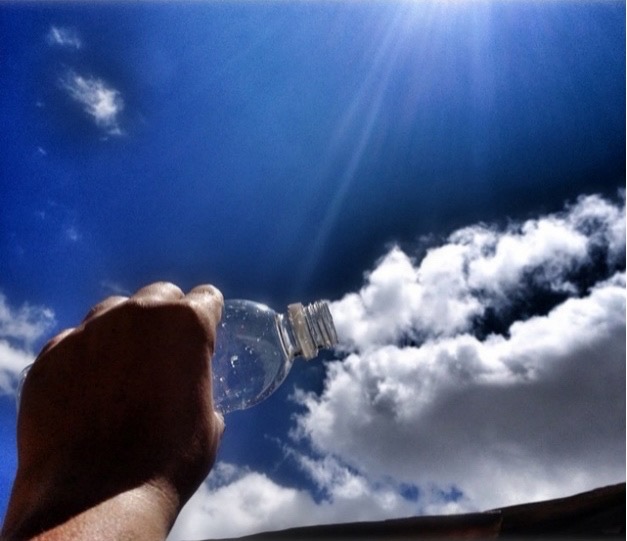
Have you ever tried to catch the clouds in your hand? Or try to hold the Tower of Pisa to keep it from falling?
There is one photography trick that almost everyone loves but not everyone knows how to use: Forced Perspective Photography.
What Is Forced Perspective Photography?
Forced perspective is a technique used primarily in photography, filming movies, and architecture. It’s about creating optical illusions by making an object appear larger, smaller, farther or closer than it really is.
Yes, basically it is to fool our eyes into creating something that seems logically impossible, but thanks to creativity and imagination, you can make it look real. Once you’ve finished reading this blog, you will not be able to wait to go outside and get to try out this technique.
How to Take Forced Perspective Photos?
As mentioned above, the key is creativity and imagination. It is achieved by mixing the background of the photo with the foreground, making it appear that the two objects have the same importance. Of course, these two objects have different sizes and it is precisely this that tricks our eyes into creating an optical illusion. It is all about composition, zoom, and perspective. To get the coolest and impressive photo effects, the following steps must be followed!
1. Make Your Plan
In order to harmonize each visual element, you need to think about what the scene you want before you take the photo, as well as figure out how you are going to execute each shot. So, you need to make adequate preparation to carry out a forced perspective photo.
Before the shooting, you can Google the photos you want to take or the style you want to imitate, then observe if there are suitable venues around you. You should look for an open field and make sure it is large enough to allow you to place your camera and that no one will suddenly appear in your image.
You should also list the necessary props you need for your project, including sunlight as well, and plenty of natural light is an important guarantee for the subject to articulate naturally. If you can’t find the right area or object, consider adjusting your concept.
2. Prepare for the Poses
In many films and television productions, it is not necessary to have a very funny pose when taking a photo with forced perspective, but rather to have the right distance and angle to make the subject look harmonious in the same frame.
But if you want to take an interesting photo to post on social media, you need to conceive of an interesting pose. If you’re not sure what pose to use, at least be clear on the props you’re using and go to Google, Youtube or Pinterest to search for them. Take some time to look at the different images and pick out the ones you like. You can use them as a reference for your project.
3. Practice different Composition
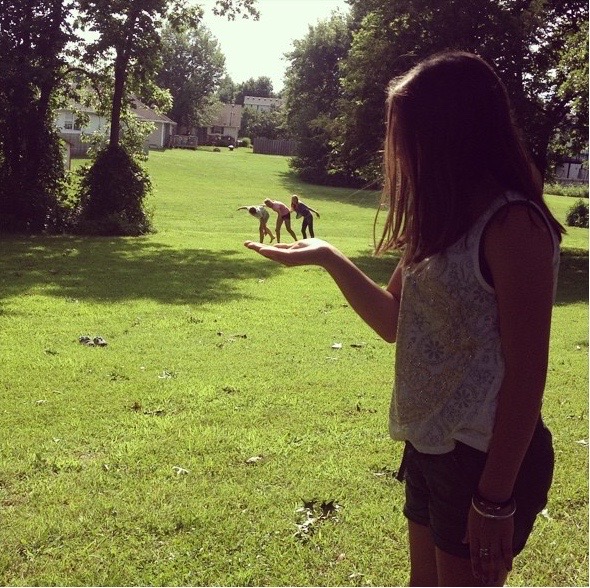
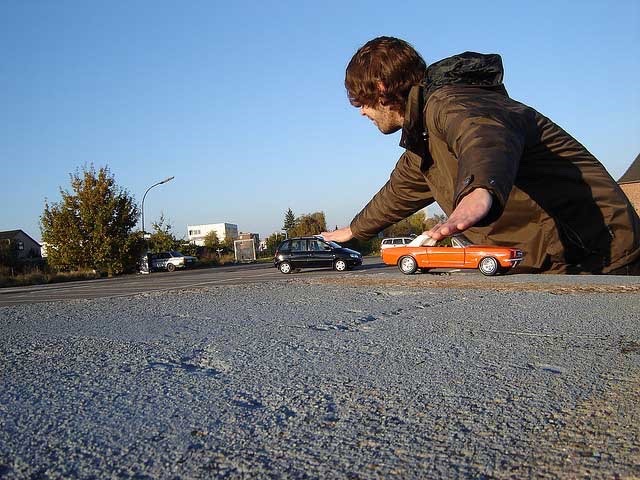
The composition is the most critical part of forced perspective photography. Before you shoot your photo you have to have thought about the composition you want to achieve. You should place people and objects in the right location and move the camera slowly to connect the two objects together. It is better to not use a tripod so you’ll have more room for maneuvering. The subject that you want to appear larger should be close to the camera. And the one that you want to appear smaller should be farther away.

Also, try some basic composition rules to keep your shots balanced. Turn on your camera’s grid line and use the rule of thirds to frame your image.
The most basic of all photography rules, the rule of thirds, is all about dividing your shot into nine equal sections by a set of vertical and horizontal lines. With the imaginary frame in place, you should place the most important element in your shot on one of the lines or where the lines meet.
4. Shoot with a High Zoom
It is better to work with a high zoom. The higher the magnification of the zoom is, the wider the area of focus at the wide-angle and telephoto ends, and the more versatile the use can be.
Firstly, you’re going to find a large enough space so you have the most options of where to position your subjects. Next, you’ll want to position your subjects along the horizontal line which runs from the camera outwards. And now for the gear, a camera with the wide-angle lens is best, even though most people are creating forced perspectives with just their phones.
You’ll want to use a wide-angle lens that’ll give you the most options for creating different sizes of subjects. The lens we use has a focal length of 11 millimeters to 16 millimeters, but any focal length under 35 millimeters is considered wide-angle.
5. Use Higher Aperture
Aperture is the most important factor in determining the depth of field. When focusing your shot, aim for somewhere in between your subjects. They should all be in focus when you zoom in to check on them. Depending on how you shoot the photo serves to enlarge or reduce the size of the elements. From a closer point of view and focus, you’ll get up to the elements to appear larger.

The wide focus will make everything seem much closer together, so make sure you use the highest aperture you have. Cranked up your f-stop, but by using your highest aperture you’re going to lose a lot of light. So you’re going to want to make sure you have really good lighting conditions to make this trick work. The narrow depth of field will guarantee you a beautiful, soft image.
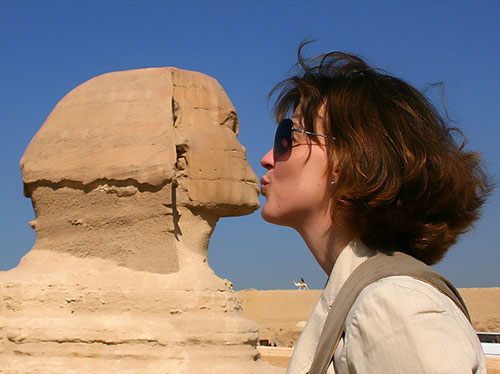
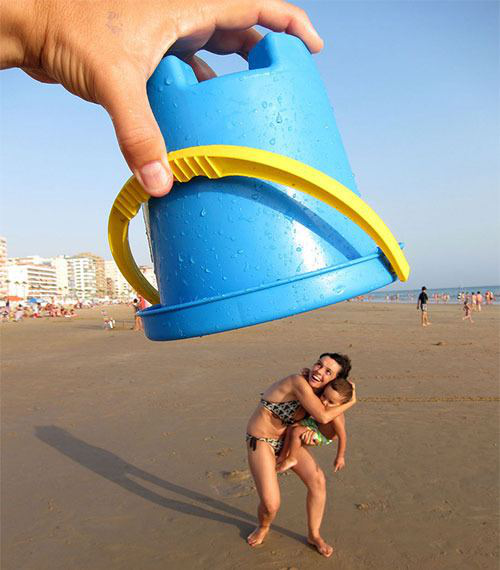
In the photo above, the photographer chose a very good angle and used a small aperture, so it creates a nice forced perspective from a distance. However, it would have been better if the photographer had moved the camera a little further away from the subject.
6. Focus
To create beautiful forced perspective shots, make sure you also illuminate your subject adequately. It may seem very easy, but if you focus too much on getting that bokeh in the back, you might forget that your primary focus point also has to be lit up. If the objects in the photo have different lighting or are blurred, it will make the effect look fake. Try focusing in on both the objects to create the perfect forced perspective. This will definitely fool everyone! If you want to blur the image to enhance this effect, we recommend trying out the tilt-shift effect to create a miniature effect in the background. You can use Tilt-Shift at Fotor.com just as we did in the photo below.
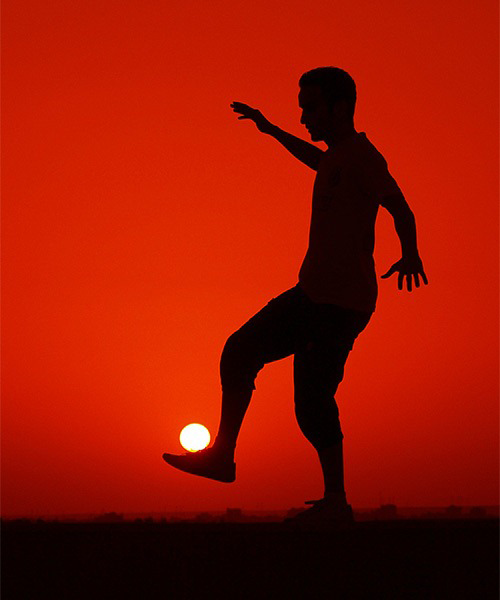
7. Choose Different Angles
Most of the time, the forced perspective photos with high fidelity are taken from two angles by the photographer. One is from a low angle, while another is from a high angle. The first one means that you need to lie on the ground or fix the camera on the ground. When shooting a tall or high subject from a low angle, it creates a sense of depth and intimidation, which allows you to depict the presence and intensity of the subject. Since the sky usually forms the background, it is easy to adjust the photo composition.
Another is an angle where you tilt the camera downwards to face the subject, which is also referred to as a bird’s eye view. As this captures the subject in its entirety, it results in a descriptive picture that clearly captures the surroundings as you see them. Since the ground tends to form the background in the picture, you may want to adjust your choice of background.
Final Thoughts
Only after experimenting and taking a lot of photos will you learn how to take forced perspective photos well. Try different things out, experiment, and work with the scenery. Composing photos with hilarious elements is always interesting. Show us what tricks you can pull out of your hat! Edit your photo with Fotor and then make sure to share it on our Facebook page and yours!
Powerful AI-driven editing tools like AI background remover, AI enlarger, object remover, one-tab skin retouch, AI image generator, etc.
Help you easily enhance photos from any aspect.
Or you can make a photography website to save and share your images easily. Here is a unique offer that will appeal to all avid photographers and web designers looking for an opportunity to save thousands of dollars on the launch of their portfolio sites. Using a ready-made photography website offer, a photographer is provided with an ultimate toolkit of solutions needed to launch an appealing and competitive web resource.